6 min read
The owners of a University area home built in 1929 wanted to renovate their galley style kitchen to add lightness, brightness and better storage. This was achieved with new finishes, cabinets, fixtures and appliances unifying the room and complementing the historic elements of the home.
The kitchen had undergone several updates over the years. One side had wood cabinets built in place during the 1950s. On the opposite wall were white laminate cabinets with wood trim popular during the 1980s. The two eras clashed in the room and did not provide proper storage or organization for the homeowners who love to cook.
There was also a “service area”, a butler’s pantry that separated the kitchen from the dining room. Within that space there was a glass door cabinet original to the home that would be salvaged during the renovation.
We helped the homeowners to make the changes they desired within the original footprint of the kitchen incorporating the butler’s pantry into the kitchen to improve aesthetics but more importantly make it a functional, practical space for people who enjoy cooking. The project took a short 21 days to complete.
Project Consultant: Melissa Sposato
Lead Carpenter: Joe Richmond
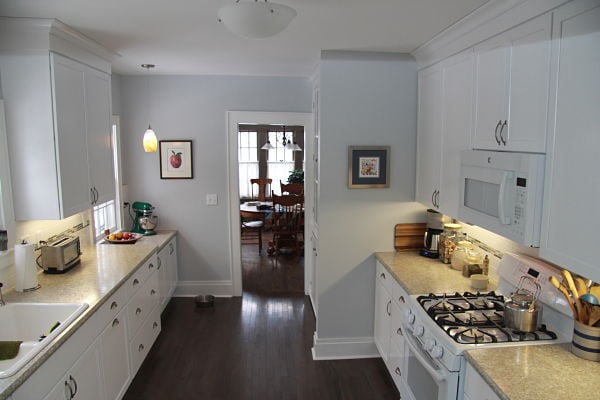
A galley kitchen was brought up-to-date and restored to reflect the original character of a home built in 1929 by adding white painted Shaker-style cabinets, white oak wood flooring, white appliances, a white cast-iron sink, laminate counters, tile backsplash and new lighting fixtures.
Homeowners' Objectives
The homeowners presented us with the following challenges:
- Create a “user-friendly” kitchen. A galley kitchen design can be very efficient for people who love to cook. The long stretch of counters in the layout provides ample space for food prep and for keeping small appliances at hand. The placement of appliances and the sink is a convenient set-up for a cook, and creates the perfect working triangle. The existing space was adequate but needed modification for the way the homeowner works in the kitchen. It also felt dark and closed in.
- Optimize storage. In 80+ years the way people use a kitchen has changed. Storage is needed for pantry items including spices, oils and prepared foods; small appliances that may be infrequently used; mixers; modern cookware and kitchen tools. The existing cabinets were time worn and did not provide enough space.
- Improve lighting. While the kitchen had a source of natural light provided by windows on the sink wall, old fixtures and dark wood cabinetry on one wall made the kitchen dreary. With long counters, under-cabinet lighting would be needed to illuminate work areas. By opening up the wall between the kitchen and butlers pantry, natural light from the window in that area would also brighten the kitchen.
- Keep with the style of the home. The original kitchen cabinets were most likely white painted wood and a white sink and appliances were used. That was the predominant style of the 1920s and 1930s. In the 1950s, wood stained cabinets were the trend replacing painted cabinets that may have been chipping and warped after decades of use. During the1980s, the clean look of easy care white laminate cabinets was in style. However, these trends are not reflective of the original elements of the home. The patterned vinyl flooring of the kitchen was outdated, torn and required replacement.
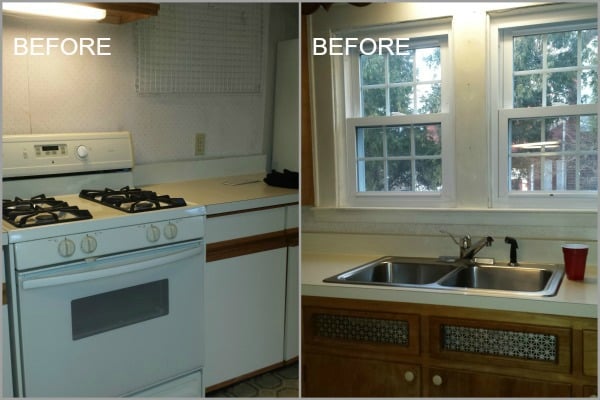
The original kitchen was dark and uninviting. While the galley layout was a good design for the home, but the cabinets did not provide adequate storage. Cabinets had been replaced, first partially in the 1950s on the window wall and later in the 1980s on the interior wall. There was a service pantry area between the kitchen and dining room that did not function well.
McClurg’s Solutions
1. Design a “user friendly” kitchen.
We designed the remodel to fit within the existing space, while incorporating the butler’s pantry into the main kitchen. Plaster walls were demolished and replaced with drywall. A wall between the kitchen and the butler’s pantry was removed to open up the room creating a 10-by-15 foot area. Cabinets were brought up to the ceiling to provide additional storage. The ceiling of the adjacent vestibule was also raised seven inches to create a taller space and more lighting was added to brighten that area.
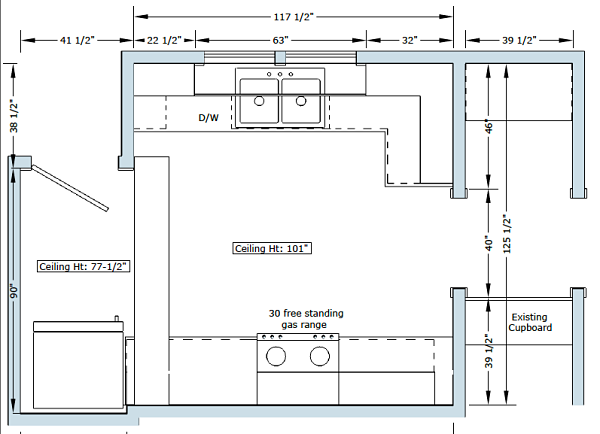
Architectural drawing of the galley-style kitchen remodel.
A “user friendly” kitchen design incorporated the needs of all the home’s residents, including the family dog and two cats. There is ample counter space for the items the owners want to have at hand including pet treats, a coffeemaker, a crock of kitchen tools and CDs and a CD player to add music to the room.
2. Create more storage space.
In addition to bringing the cabinets up to the ceiling, base cabinets were added to a wall under a window in what had been the butler’s pantry to create a work area for baking. A cabinet from the butler’s pantry was salvaged and repainted to blend with the new cabinets selected for the kitchen. New hinges and hardware were added. Hardware used for the rest of the kitchen cabinets are Top Knobs “Arendal” pulls and “Somerset” cup pulls in a pewter finish.
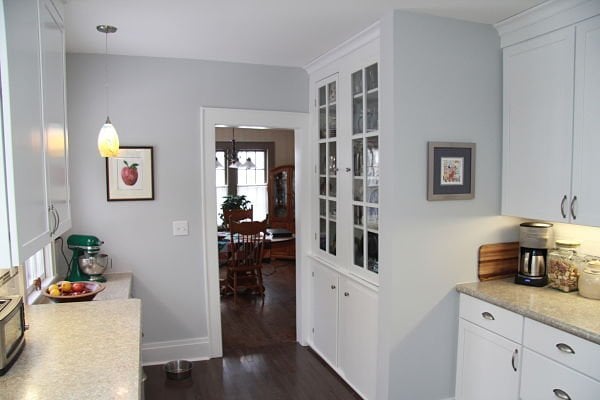
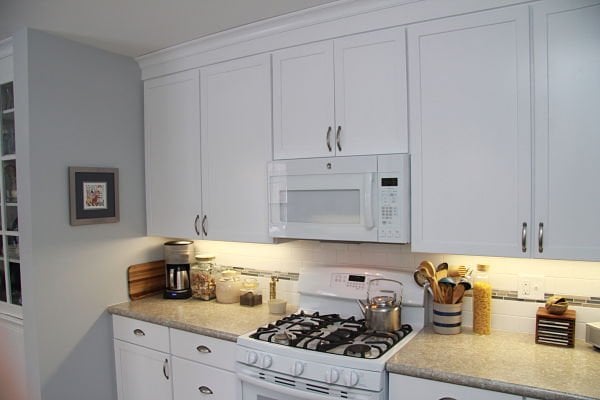
New white Shaker style maple cabinets brought up to the ceiling to create additional storage blend with a refurbished butler’s pantry cabinet that was original to the home. Removing a wall between the kitchen and service area created space for more cabinets including base cabinets that serves as a work area for baking.
3. Improve the lighting.
A center semi-flush light fixture with a glass dome was selected to provide general lighting to the kitchen. Taking down the wall that separated the kitchen and the butler’s pantry provided more natural light to the room. Two art glass decorative pendants were installed over each window to illuminate the sink and baking area. Under-cabinet lights were used to illuminate counter task areas. A recessed light was used in the vestibule.
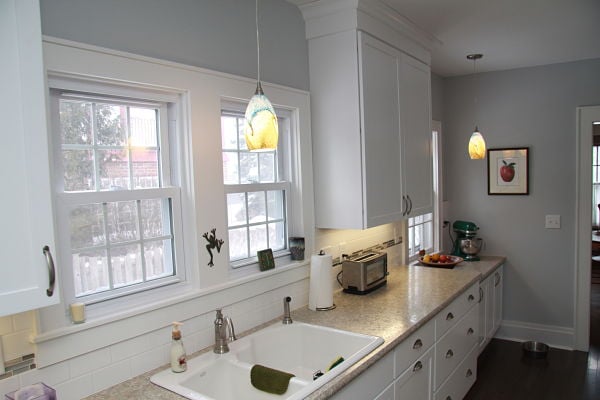
The lighting design for the kitchen considered natural light sources, task lighting of work areas and decorative lighting used for both function and aesthetics.
4. Restore the historic style of the home.
Here are the changes we made to maintain the home’s historic style:
- White “Shaker” style maple cabinets from Bishop Cabinets were selected for the kitchen and the salvaged cabinet was painted to match.
- Prefinished 2¼-inch white oak flooring in a “Charcoal” finish replaced the vinyl floor to blend in with adjacent wood floors.
- Crown molding and extra wide window and door casings with a back band were used to replicate the original trim of the home.
- A white double offset cast iron sink from Kohler was used.
- White appliances were selected to unify and brighten the room.
- An over-the range microwave oven/vent unit was added. The appliances replicate the gas stove and ice box used in the 1920s.
- Timeless 3-by-6 inch arctic white subway tile with mixed linear “Surf & Turf” mosaic accent tile from Vestal Tile was selected for the backsplash.
- Wilsonart “Sedona Spirit” laminate countertops with a crescent edge that resemble granite were used for the project. Laminate has been improved over the last decade in both style and durability. It was a good choice for this remodel.
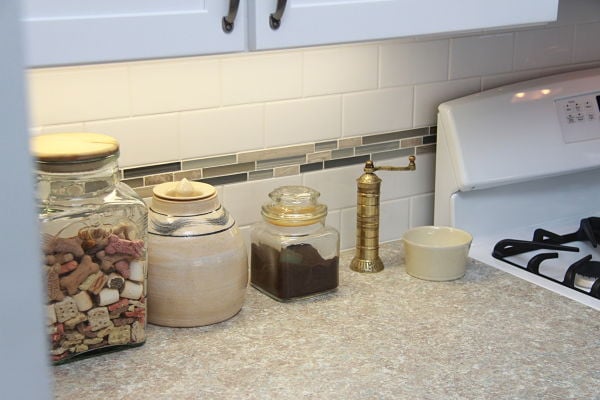
White subway tile and linear glass mosaic tile were used for this backsplash to complement appliances and the granite-look laminate counters.
Related Posts
Project of the Month: Onondaga Hill Kitchen Makeover
Small changes can make a big impact in a kitchen. Adding new counters or appliances, a sink, a...
Project of the Month: A 1930s Syracuse Kitchen Remodel
A kitchen is the hub of activity in every home. New appliances and gadgets have changed the way we...
Project of the Month: A Minor Kitchen Remodel Transforms a Home
It’s amazing how new countertops, backsplash and appliances along with some paint and a little...